So, you want to start painting miniatures? Welcome. Consider this your all-encompassing beginner’s guide on how to paint miniatures. It’s a broad bible of rock-solid techniques and essential tips to consult at any stage in your mini painting process. Our guide focuses on Games Workshop’s Warhammer ranges of models – primarily Warhammer 40k and Warhammer Age of Sigmar – but this tutorial includes everything you need to learn how paint miniatures of any kind that your heart desires.
Warhammer (and any other hobby that has you collecting and painting miniatures) can be overwhelming. First there’s the choice of which army you want to collect. Then there’s the choice of what units to get first. Then there’s the colour scheme – do you paint it like it is on the box, like something on the #paintingwarhammer Instagram, or something entirely fresh from the creative juice-pits of your own spongy brain? What are the best paints for miniatures you should be using, anyway?
All of that, before you’ve even put paintbrush to plastic. The process of painting itself can feel even more perilous – each step is rife with possible techniques to use, each with multiple stages, each of those representing various degrees of difficulty, and on, and on…
There’s tons of advice about what you should be doing online, but it’s often easy to get lost and forget the bigger picture: painting is about what you could do rather than what you should do. There is no real right answer – only personal preferences, learned via experiences with your own models.
With that in mind, this is a comprehensive guide that offers up a parade-ready miniature painting marathon – we hope you find it useful! If you have any questions, do leave them on the Wargamer social channels linked below, and we’ll see if we can help!
Let’s start by summarising the stages involved. Creating highly detailed miniatures is super-satisfying, and the different stages are all easier to get the hang of than you’d think. If there’s a particular stage you’re looking to brush up on, click below to head straight there.
Otherwise: read on, pay attention, practice – and you’ll be turning out glorious paint-jobs in no time.
Here’s how to paint miniatures:
- Building your model
- Priming
- Base coating
- Shading
- Layering
- Edge highlighting
- Drybrushing
- Blending
- Fine detailing
- Weathering
- Basing
Building Your Model
Tools you’ll need:
- Your chosen sprues (the plastic frames full of raw model bits)
- Instructions
- Plastic modelling glue (a.k.a. polystyrene cement)
- Plastic cutters
- A sharp scalpel or craft knife
- Super glue (optional)
Oh, building.
Some love it, some hate it. It can be a lot of fun if you’re putting together a one-off character hero, but a slog if you’re building 10, 20 or 100 of the same troopers. Nevertheless, you can’t deny the satisfaction of seeing a simple, grey sprue turn into something imposing, dynamic and fully three-dimensional.
The key to building (as with a lot of the stages in this guide) is patience.
You can very easily make mistakes. Pay too little attention to your instructions and you can stick the wrong pieces together, in the wrong places, at the wrong times. This results in you having to rip your model apart for emergency reconstructive surgery, ruining its otherwise tidy looks by disrupting the still-drying plastic cement.
It’s also easy to overlook mould lines and sprue gunk (I have no idea what the technical term is for this, but the little bitty bits of plastic left behind when you snap your parts off the sprue) [this is also called ‘flash’ but for the life of me I don’t know why – Ed.].
For that, you’re best off grabbing your sharp scalpel and gently running the edge of the blade along the edge of your model to shave or scrape away any unsightly plastic. This can be really hard to do on certain models like Age of Sigmar’s Lumineth Realm-Lords, whose elegant spears and bows are spindly and weak. You’re less in danger of breakage if you’re handling thicker models like Space Marines – but still take care, as you don’t want to damage the plastic.
Pay attention to the assembly of your model, and think ahead. You’ll preferably have a plan before you even start snipping plastic. Painting via sub-assembly (painting separate portions of the model on their own, before gluing them all together) is the best way to get the tidiest, cleanest results when painting, and that should be addressed at the build stage.
You might find that putting together the body of a soldier and keeping the arms and head separate gives you more room and manoeuvrability. Or if you’re dealing with a big model, certain large parts can be painted separately to keep things easy to handle.
Whichever way you choose to build, be careful to not overload with glue, and make sure you let things dry before fiddling. The worst thing you can do is disturb a part and have it fall to pieces, spreading half-dried glue everywhere.
That said, if you do have a glue-melting, pose-bending catastrophe, don’t panic – like almost everything in the miniature-painting hobby, it can be rescued. Just stay calm, clean off any excess glue or melty plastic – then re-apply a (probably smaller) amount of glue and try again. You’ll get there.
Priming
Tools you’ll need:
- Primer (any colour)
- Paintbrush (any kind, a suitable size for the model)
- Spray can (optional)
- Airbrush (optional)
- Bowl of clean water
Once your model is built – either completely or in sub-assemblies – you’re ready to prime it.
Priming was something I foolishly ignored for a long time, but it’s truly an essential part of the painting process. You want to get a strong, adhesive undercoat down on the model so that the subsequent layers you put on top have something sticky to hold onto, rather than the smooth glossy plastic.
You can do this in three ways. The first is via the brush – use thinned down primer to apply an all-over coat to your model. It takes some time, but this is by far the cheapest way and probably the method you’ll use if you’re a beginner. Just be careful not to clog the finer detailed parts with paint, and to be consistent with your brushstrokes.
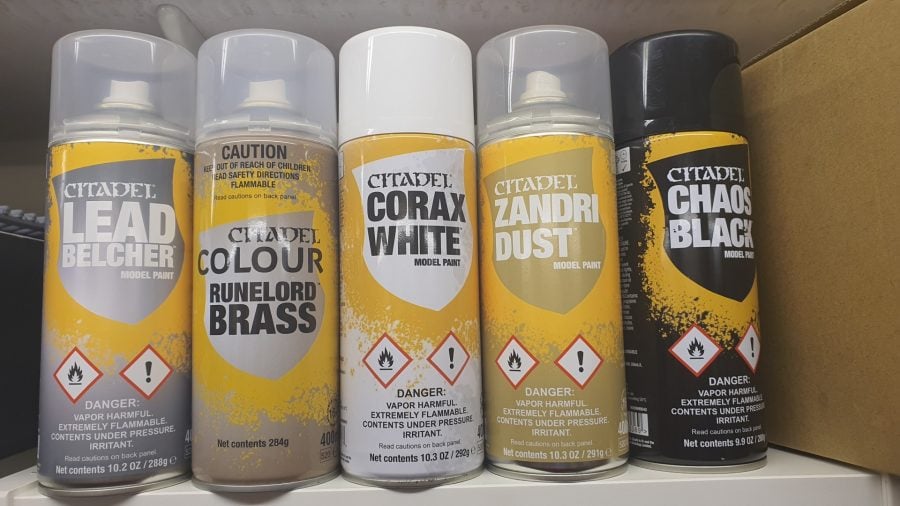
The second is via spray cans (such as those pictured above), which is quickest and simplest, especially if you’re bulk-painting a whole army. Games Workshop does decent ‘rattle-can’ primers in a range of colours.
The one thing to watch out for with can-spraying is that your finish is heavily dependent on the temperature of the room. Too cold or too warm and the paint will not look good. It’s therefore, I find, the riskiest and least preferable way to prime and base your models, and instead, I refer you to option three…
Airbrushing
Now, airbrushing is a technique you can use in all kinds of ways. They’re incredible for advanced blending, but also an invaluable tool, simply for priming and base-coating.
Many beginners will be deterred from getting an airbrush, partly because a decent one will set you back at least $100+, and partly as they have a reputation for being finicky buggers – but they’re easy to use really. It’s just a case of keeping it clean, and going easy with your trigger finger.
Start collecting: Our guide to 40k combat patrol starter boxes
Undercoating with an airbrush is by far the best way to get a perfect, smooth finish of primer on your models. They’re more predictable than the spray cans, and more versatile too – you get more for your money in the long term.
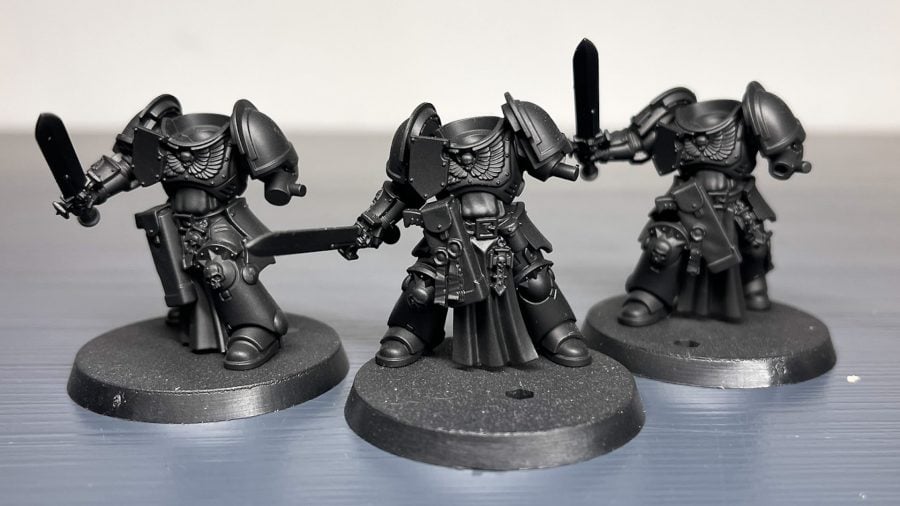
To summarise: a thin, adhesive coat to cover the bare plastic, applied via brush, can or airbrush. By the end of the process, you’ll have a model ready for base-coating. You can see what a smooth finish you can get with an airbrush in the image below – these are Space Marine Bladeguard Veterans from the Warhammer 40k Indomitus box set.
Base coating
Tools you’ll need:
- A paintbrush (any kind, a suitable size for the model)
- Spray can (optional)
- Airbrush (optional)
- Paint (any colour)
“Isn’t base coating the same as priming?” I hear you ask.
No.
If your little plastic person is a house, the undercoat is your foundation. Much like whatever’s under your house, you don’t want to see the prime coat foundation when you’re done, but you do need it for the whole thing to stay built and not fall apart into a streaky mess
So, the base-coat is the paint or brickwork you see on your house when you’re done. The foundations are hidden, but important. Also important is this: if you’re base-coating the same colour as you primed (i.e. black) you’re still going to want to apply a black base-coat over this prime layer.
The reason for this is mistakes and consistency.
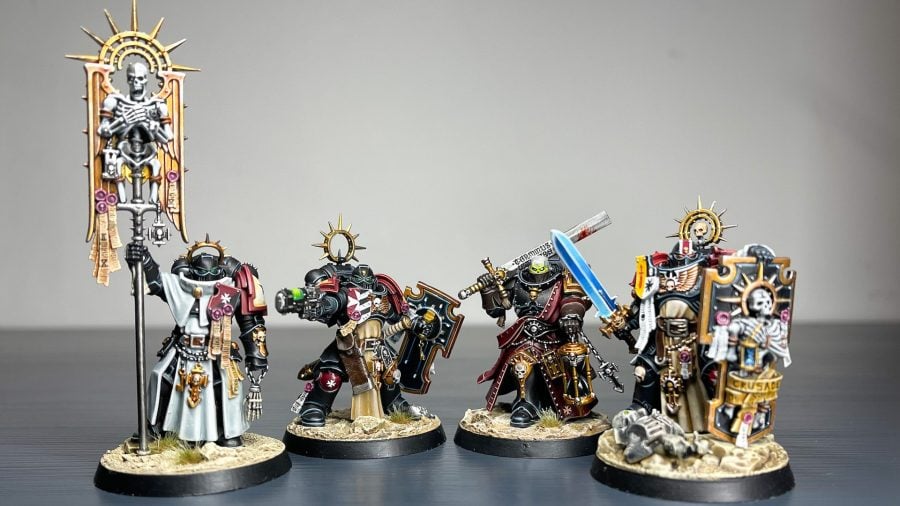
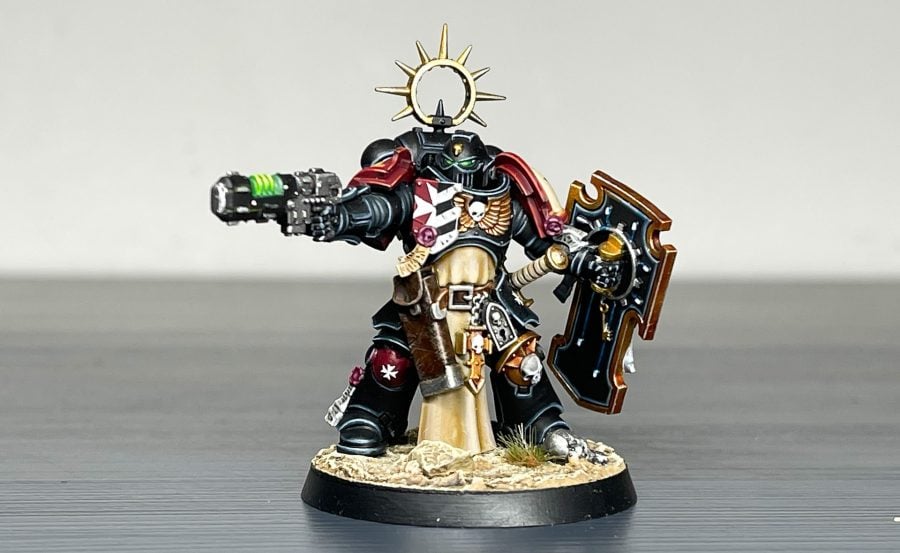
For example, let’s take a Primaris Space Marine Lieutenant of the Black Templars chapter, which I painted recently.
This was primed using Vallejo Black primer, through the airbrush. I then base-coated it, once again via the airbrush, this time with Citadel’s Abaddon Black.
Why? Well, if I left it primed using the Vallejo Black, only to make a mistake later in the painting process, layering over with Abaddon Black wouldn’t blend in. You would be able to see a difference between the two types of black colour I was using. The same goes for every shade. Not every red or blue or green is made equal – the changes will show.
Just like priming, you can base with a brush, can or airbrush.
Whichever you choose, be careful not to clog details, just as before; base-coating is about achieving a smooth, consistent basic colour on each distinct area of the model, each of which can then come to three-dimensional life later on. The key to success here is patience: the patience to thin your paint down with a goodly amount of water and lay down (at least) two thin coats of each base paint, letting each one dry on its respective portion of the model, before applying the next.
About those paints: you want a good strong colour as a base for each key portion, and you usually want to start with the model’s biggest area of colour first, then work up to the smaller details. For the Black Templar above, for example, the black armour is by far your dominant colour.
But, after that major colour is down, you start working at your mini with a brush (if you weren’t before) adding the cream of his tabard, followed by the gold, and then a range of other colours making up the finer details.
You can do all the base colours in one stage, or proceed through the other stages on one section of the model, before returning to base-coat the others later.. It’s really up to you – just stay precise and consistent, with thin paints.
Shading
Tools you’ll need:
- Paintbrush (any kind, a suitable size for the model)
- Shade, wash or contrast paint
- Bowl of clean water
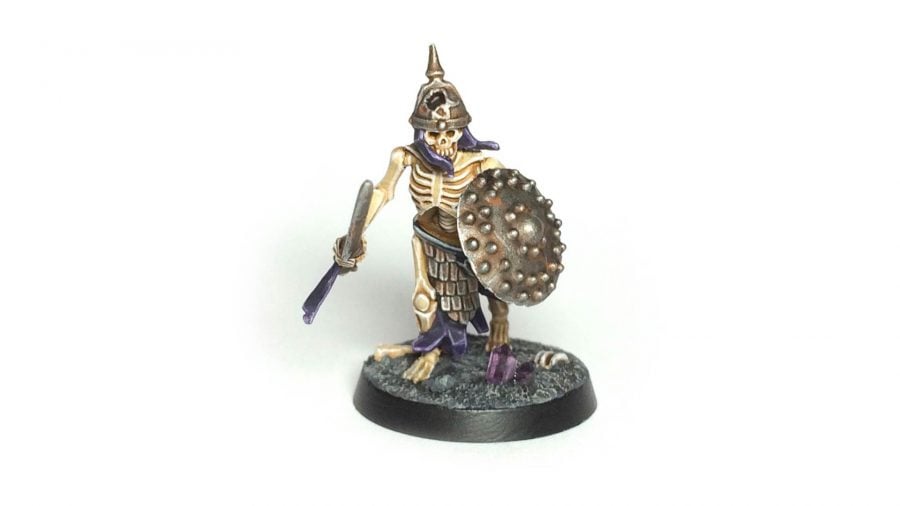
Usually, the shading stage is when your model first starts to truly come together before your eyes. It’s when you get all that lovely definition back, after spending a while dealing with solid blocks of flat colour. Look at the skeleton warrior above (not mine, this time, I’m afraid, but courtesy of a Warhammer Community post); see the shadows in between those rattlin’ bones? That’s shading, that is.
Shading is an essential process for any model, but once again there are many ways you can complete this key step. Whichever way, it’s always gloriously satisfying once a model is shaded.
The primary method I use to tackle this is using Citadel Shade washes. These are fantastic, low-viscosity liquids that come in a variety of different colours, and which easily run into all the recesses, nooks and crannies of your model. It gives your tiny fighters’ armour panels separation, while also bringing out details on certain recessed pieces of plastic. You’ll want to pair them with the right colours, and you’ll quickly learn which Shades fit each colour palette.
Also, pay attention to their different finishes – most Shades are a matte finish, but some of Citadel’s Shades have a Gloss variant that can work really nicely over metallic paints.
It’s important not to let washes run away with you (excuse the pun).Use sparing amounts on your brush, and don’t worry if you have to repeat coats to add extra depth and emphasis. For certain materials, like large, flatter areas of cloth, you’ll want to be especially careful with shades, so that they don’t pool in one area and dry inconsistently.
In fact, for these types of materials, you’re actually better off using one of a couple of alternative shading techniques.
The first is creating your own shade paints by thinning down paint with water or Citadel’s Lahmian Medium. This often dries much more consistently than a Citadel Shade, especially on flatter areas.
The other is Citadel Contrast Paints, which are fantastic in their (admittedly limited) uses. These are much thicker, gloopier liquids to work with. Be careful to not lose control with them as they can quickly overrun a model. However, they are fantastic at dealing with larger, textured areas of plastic – like a cloak, for example – as they have much higher viscosity than a Citadel Shade, allowing them to ‘glob’ more naturally and evenly across the surface’s contours, rather than pooling in focused areas.
Be sure to let your shades dry entirely before painting over them. If you disturb a Shade finish before it has dried, you will reveal the paint below in a concentrated area, and suddenly, in one infuriating instant, the illusion of beautifully painted metal, wood, or cloth is ruined.
Don’t forget: you can also layer shades up gradually to create visual separation between light and dark. They’re just magic, and learning to work with them is a world of painting fun and experimentation options that you need to explore.
LAYERING
Tools you’ll need:
- A paintbrush (fine tip, ideally of high quality)
- An arrangement of layer paints
- Bowl of clean water
We’re into full swing with the model now. Layering is when we take that base coated, shaded plastic and add mid-tones over the top of it, to create even more depth.
It’s essentially a form of highlighting, although the more extreme “edge highlighting” technique is something we’ve broken out into its own category, coming next.
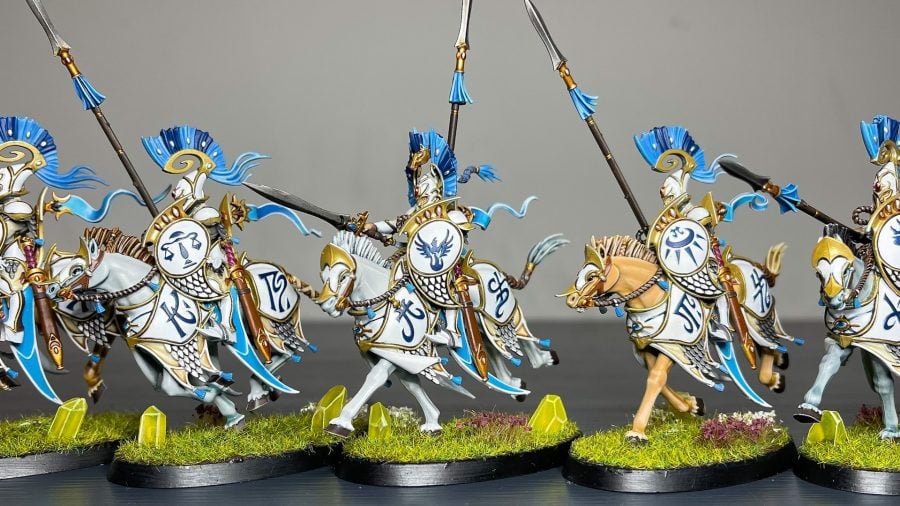
The best example of layering we’ve completed recently is for these Lumineth Realm-lord Vanari Dawnriders, as their horses have a lot of depth to them, but are smooth, organic beings, not hard-edged armour panels or swords. The layering on creatures like this has to be more subtle than the glint of light off the edge of a spear.
It’s therefore important with layering that we use subtle blends and thin coats, in order to create as gradual a gradient as possible between light and dark.
There are obviously degrees of this, but you can see on the legs and neck areas how each horse has been base coated with a darker mid-tone, shaded to get all that lovely dark detail into the recesses of its flesh, and then layered back up with brighter and brighter colours (in smaller and smaller areas) until you have a nice range of tones throughout the whole model.
Take your time, use thin coats, and don’t overload your brush – this will cause the layers to come off as too harsh and vivid. Also: never be afraid to start again, if you need to, by painting your base colour back over and starting again.
As long as you’ve followed the priming and base coating stages, as well as kept your paint thin, you’ll be fine. Like I said: if you’re patient and careful, there’s no miniature-painting mistake that can’t be made into a marvel.
Edge Highlighting
Tools you’ll need:
- A paintbrush (fine tip, ideally of high quality)
- An arrangement of layer paints
- Bowl of clean water
Edge highlighting is the sharp-edge layering I was talking about earlier. It’s a transformational (but ultimately optional) effect to add to any model.
It is a perfect way of imparting an immense boost of depth and vibrancy to something like the power armour of an Astartes soldier, or adding reflective depth to metallic surfaces.
There are several steps to edge highlighting, and all models are different, so you may skip some or add others depending on your needs, but we’ll focus on Space Marines for now. Their many-edged power armour suits offer the best all-round introduction to this technique.
Essentially, you are adding brighter paint to points on the model that would most reflect light. This means parts like the wrist panels, tops of the knee pads, edges of chest plates, and the ridged areas on a Space Marine’s helmet. It allows your eyes to best parse the various definitions.
In the most time-consuming (but most effective) form of this technique, you want to do this in multiple stages, going from a chunkier highlight using a shade or two above your base coat, all the way to really thin, really bright extreme highlight colours for the very sharpest of edges.
Let’s use those Black Templars as an example again. This aforementioned Lieutenant has been painted with an Abaddon Black base coat, highlighted with a chunky edge of Incubi Darkness, followed by a thinner highlight of Dark Reaper, followed by an even thinner highlight of Thunderhawk Blue. The most intense edges are finished off with a miniscule amount of Fenrisian Grey. It really helps to bring out the model’s definitions and give it shape.
The best way to achieve the effect is with a sharp, fine-tipped brush. Your paint needs to be thinned down from pot-consistency, but not runny. And you should use the side, not the tip, of your brush to catch only the most raised edges of the model, where you can.
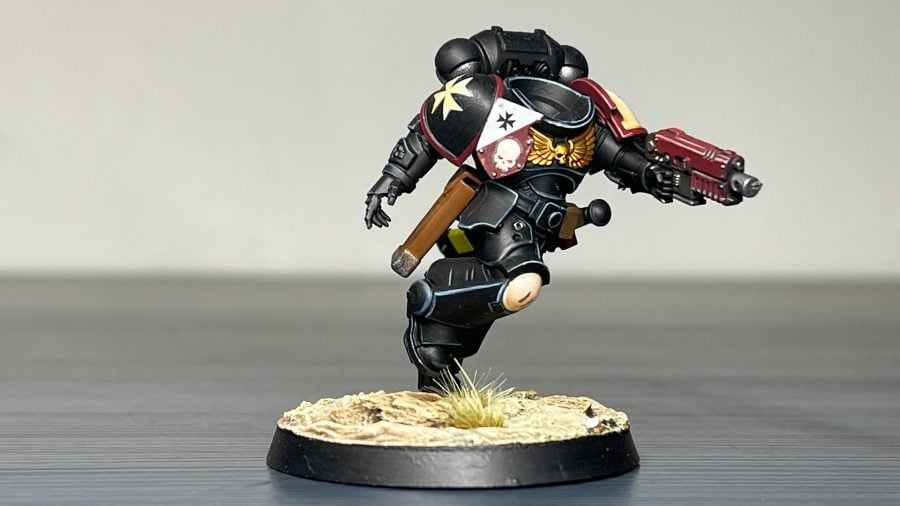
Now, you don’t have to do it in so many stages. You can, if you prefer, do a simpler highlight with two, or even one highlight.. The effect is still impressive, as seen on the unfinished Black Templar trooper at the top of this section.
This is a one or two stage highlight with brighter colours, and you can see a similar effect on the red of his unfinished gun.
Drybrushing
Tools you’ll need:
- A dry brush
- Your paint colour
- Blotting or tissue paper
Drybrushing looks easy, but it can be really tough to get right in certain scenarios. However, for many types of models, it’s an excellent way to sidestep the super-involved edge-highlighting process, do something more ‘quick and dirty’ and still get good-looking troops.
The technique is very simple. You want a brush (preferably an older one which doesn’t need to keep a fine point) dipped in undiluted paint and then rubbed on a surface like tissue paper.
Working the paint into the bristles, you want to get rid of all the excess, before lightly, briskly drawing the brush across the model, to a point where you just catch the raised edges, but don’t smear paint on the rest of it and ruin all your hard work so far.
The best way is to try it on the back of your hand first. If you’re happy with the amount of paint on the brush, work it over the model in regular motions, being careful to apply the right amount of pressure. Too much and you’ll end up smearing again. Too little and you just won’t get the desired effect.
Feel free to load up your bristles with more paint when you need it, and as you work up the tones in the highlights, make sure you’re catching finer and finer edges, rather than applying the dried paint over 100% of the surface every single time – this reduces the impact of gradient toning.
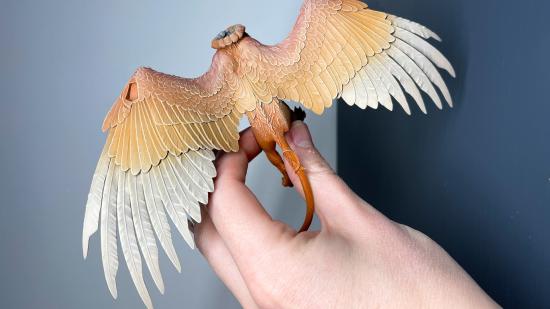
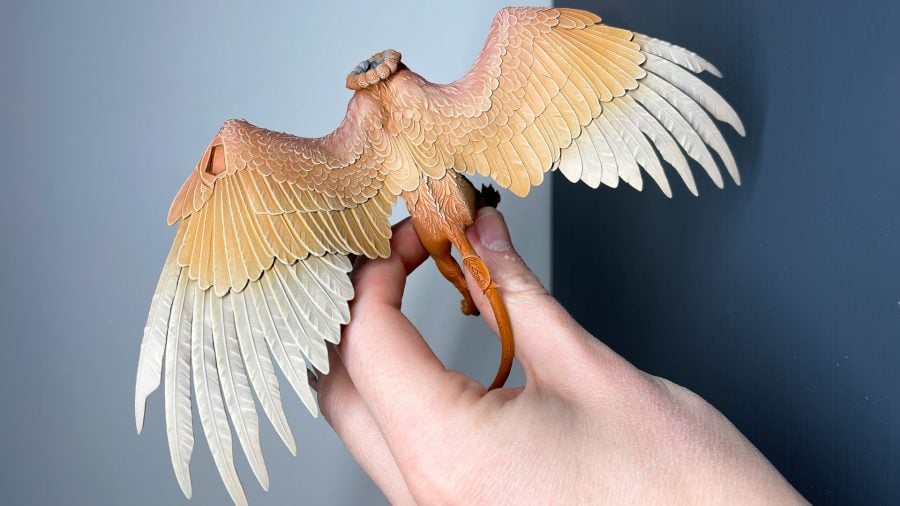
Drybrushing is perfect for items like metal guns, the entirety of Necron armies, and also for cloth – I much prefer the look of drybrushed cloaks, for example, to that of fine detail brush highlighting, as it adds more texture. The same goes for feathers; this Lumineth Realm-lord sculpt was blended using an airbrush, but the drybrushing technique has brought everything together to make it look like a cohesive entity.
Blending
Tools you’ll need:
- A paintbrush (fine tip, ideally of high quality)
- An arrangement of layer paints, ideally on a wet palette
- Bowl of clean water
- A lot of patience
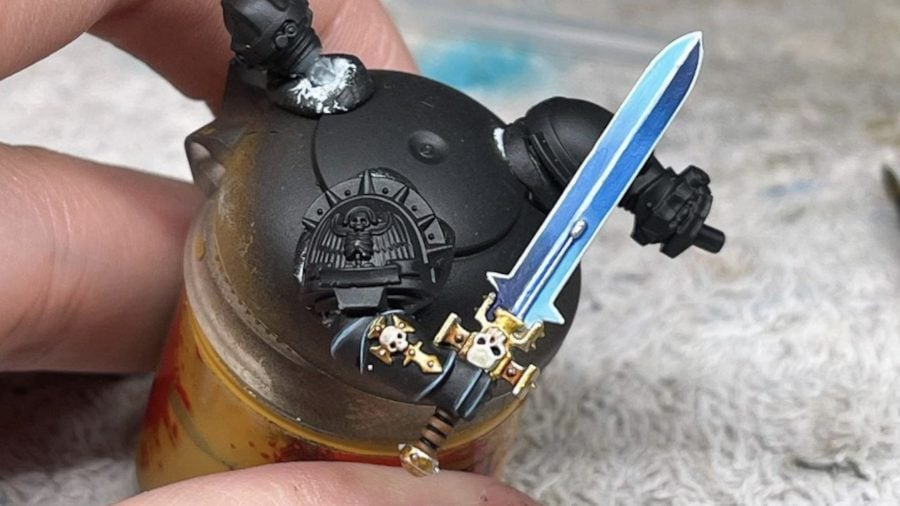
The toughest and most advanced iteration of layering is blending – achieving perfect transitions between colours on a totally flat surface to create the illusion of intense shadowing and colour shift. In Warhammer 40K, this is most often seen with power swords, shown below.
There’s an entire tutorial to be written on blending, which we’ll cover in the future, but, in short: you have to use very thin layers of highlighting and shadowing tones over a mid-tone base coat. Thin your paint down on the palette, and make sure you get almost all of it off the brush, so none of it pools in unwanted areas when you put paint to plastic.
It’s a fine art you’ll develop through repeated practice.
You work these layers up, gradually, letting each super-thin coat dry before applying the next. As the colour intensifies, you’ll start to define the spectrum from super-dark to super-bright, while working in as many gradient tones as you can in-between, until your transition is beautiful and smooth, and creates a striking, natural-looking contrast between light and dark.
Finish it off with an extreme edge highlight to really make it pop.
Fine Detailing
Tools you’ll need:
- A paintbrush (fine tip, essential that it is high quality and precise)
- An arrangement of layer paints
- Bowl of clean water
A lot of your model is pretty much done now.
The rest is the special stuff – the fine detailing that’ll really stand out.
These can range from wax seals on a Space Marine sergeant, to glimmering gems on an aelf’s helmet, to scarred faces, moist eyes and the inked text on tiny scrolls. We’ll go into these individually in more depth in future.
The overall point with any detailing is to keep taking your time. It’s easy to start rushing as you approach the finish line, desperate to see your completed model in all its magnificence. But remember: thin paint in small areas is easy to fix, relatively speaking, so taking care still pays.
The key detail lots of people want to get right is faces. And with good reason: a face is a focal point on a model, and is something the eye is immediately drawn to. They’re notoriously a sticking point for some painters, but they aren’t too difficult to nail, if you have good brushes and a steady technique applying colour.
A face is just the same as any other part of your model. The scale is just much tinier.
Use paint sparingly, often slightly dabbing with your brush tip, rather than brushing the paint on in strokes. You can apply multiple different skin tones for the gradients if you want to. Lastly, with the eyes, you want a single tab of white paint in the recessed eye hole. Try and keep an outline of shade around the edges. This can then be pointed with a tiny amount of black paint for a striking stare.
It’s this stage that makes you most want for good brushes. Use Raphael 8404s if you can – they’re more widely available than other good brands like Artis Opus, and much more consistent in quality than Windsor & Newton Series 7s.
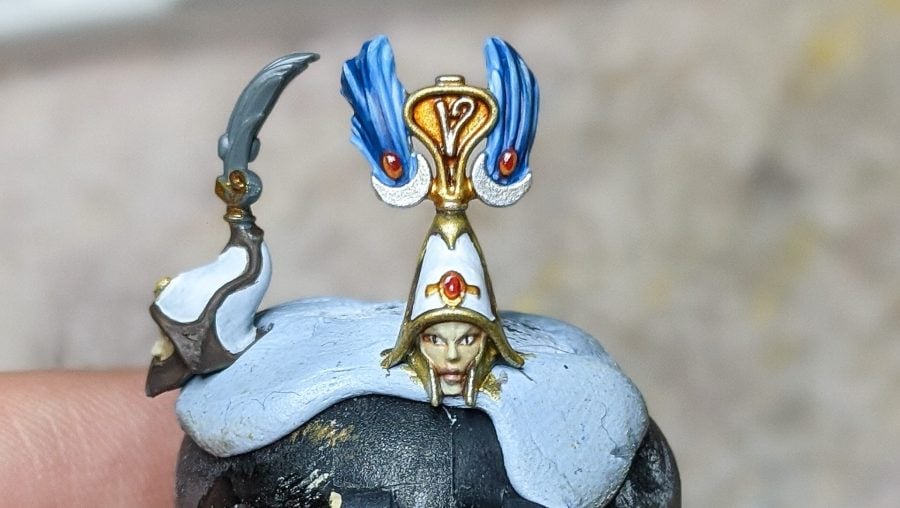
With the Lumineth Realm-Lord trooper face above, you can also see the perfect demonstration of why you paint in sub-assemblies. Doing these heads while they were attached to a model would be much more cumbersome – this provides more access to those tiny details.
Weathering
Tools you’ll need:
- A paintbrush (fine tip, ideally of high quality)
- An arrangement of layer paints
- Bowl of clean water
- Sponge (optional)
Weathering and battle damage is a totally optional step for any model, and fits your own tastes and the army in question.
It’s perfect for models like orks and space marines, but doesn’t fit the gleaming beauty of aelves, for example.
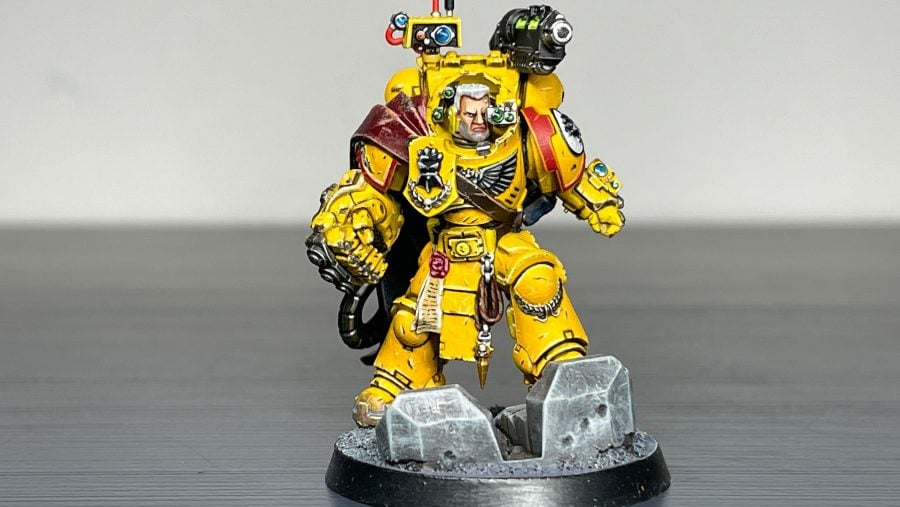
The key is still very much achieving a balanced contrast of light and dark. In this instance, we’re using Tor Garadon, an imposing leader of the Imperial Fists Space Marines. His armour is perfect for weathering, as it looks exactly like the sort of suit that would’ve seen thousands of battles and taken countless batterings in the process.
We’re working with yellow here, which is notoriously tough to get right, but the weathering technique can be applied to any other faction or colour scheme you’re working with – be it another soldier, or a tank, or whatever.
Going around the model, you want to very lightly dab, point and brush scratches all over the armour, using the extreme highlight colour you used for the armour itself.
In this instance, it’s the eye-wateringly bright Citadel paint Dorn Yellow.
Ideally, you want this paint to be thinned down a little – but not much, as you want it to be immediately noticeable, without running or splodging, forcing you to reapply your layer colours over the same area and start again.
The real key is scale: you don’t want these scratches and marks to be too big otherwise it won’t look convincing. Look at your model and think about how big they would be, in the context of his hands, legs etc.
Then, underneath these extreme light highlight scratches, overlapping them almost, you want to paint a dark colour as a shadow. In this case, it’s Citadel’s Rhinox Hide.
The resulting effect is really smart. You can also use a sponge to dapple paint on in this way to get more random effects.
For models with darker paint-schemes on metal armour, like Black Templars, applying little scratches of bright metallic paint, like Citadel’s Stormhost Silver, can also give the illusion that the faction colours have been scraped away to reveal the bare metal underneath.
Basing
Tools you’ll need:
- Several sizes of paintbrush, to reach all the crannies on your base
- At least one drybrush
- Basing materials such as grass ‘flock’, lichen etc.
At this point your model is all but finished. And I’m guessing it looks fantastic.
There’s just one final step – the base.
Basing is hard to decide on, and it’s something you can spend hours debating with yourself. You want it to stand out, but not overpower the model itself, and you want it to be consistent across the models in an army. You also don’t want it to be too hard to replicate multiple times!
Ultimately, you want to take all the techniques you’ve used painting your model and apply them to the base. The only difference is a couple of extra materials that can add real depth and realism to your models.
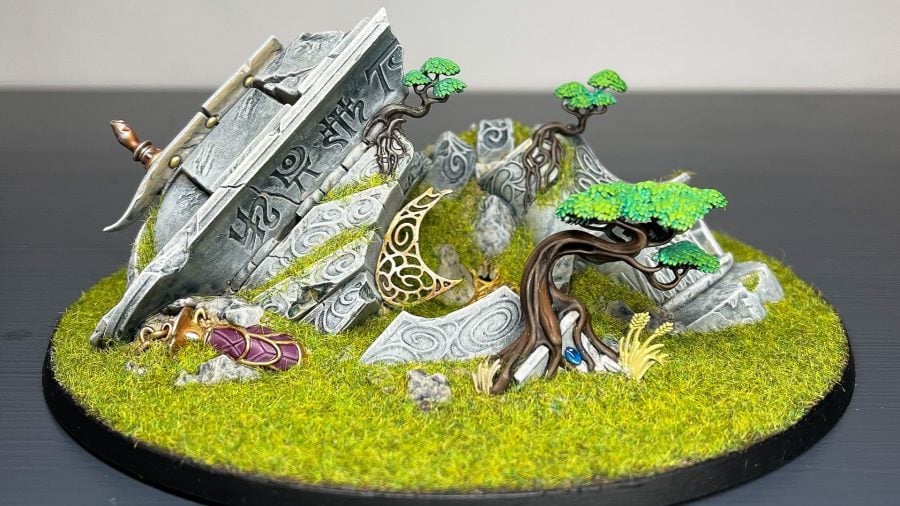
Shown above is a base I created for a Lumineth Realm-lord centrepiece model, Archmage Teclis. It encompasses practically all of the steps we’ve gone through so far – priming, basing, shading, layering, edge highlighting and drybrushing. There’s even blending on the little blue gems.
The only addition here that isn’t seen on the main model is grass flock. These sorts of materials are cheap and widely available, but can bring your armies together and make them look really striking.
Just remember: don’t be afraid to experiment. Practice on an unused base if you want to, so that you don’t end up having to restart on the base your model is on. That gives you the freedom to really work out what you want to do.
