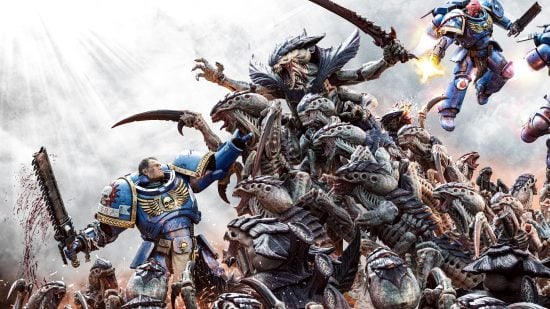
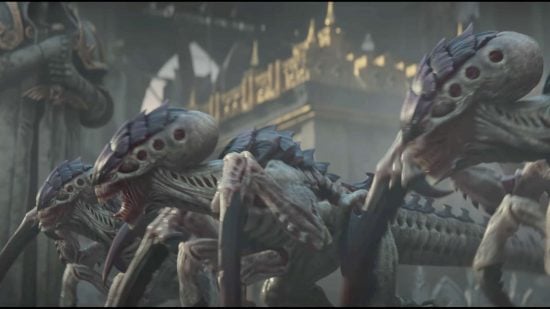
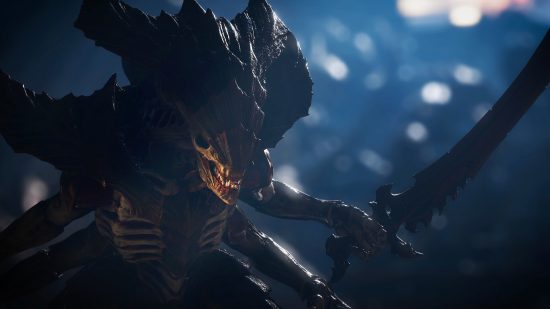
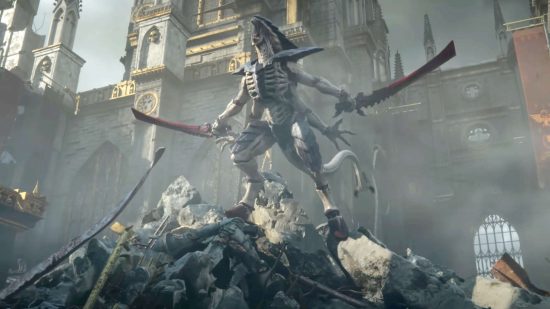
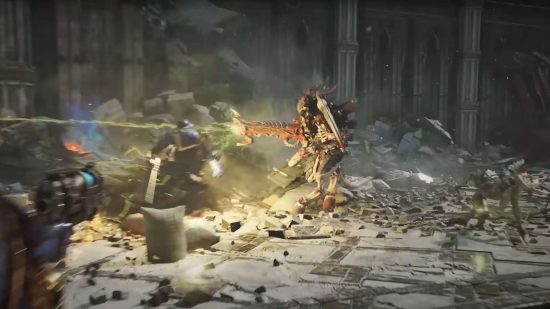
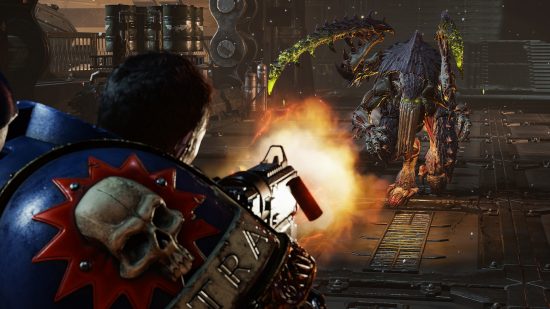
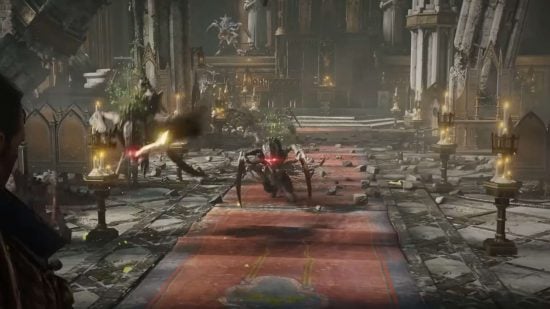
The main Space Marine 2 enemies are the Tyranids, a hive race of alien predators from beyond the Milky Way, and the traitorous Thousand Sons Chaos Space Marines, who appear partway into the story to cause you grief. This guide introduces all the basic enemies from the game and how to beat them – and a few of the bosses, too.
The Tyranid hive is controlled by a single psychic presence, known as the Hive Mind. More psychically potent than any other entity in the Warhammer 40k universe, save perhaps for the eldritch Warhammer Chaos gods, each individual Tyranid is a genetically crafted puppet serving the will of the swarm. Meanwhile the Thousand Sons are the remnants of a treachery ten thousand years old, aided by the god of sorcery and lies. The odds are definitely against you in Space Marine 2.
In this guide we track all the different Tyranid biomorphs and Chaos renegades in the game, explaining their weaponry, tactics, and behaviour, as well as providing insight into the lore behind the creatures. We have separate guides to the Space Marine 2 weapons you’ll use to dispatch these monsters, and the capabilities of each of the Space Marine 2 classes if you face off against them in Operations mode.
These are all the Space Marine 2 enemies you’ll face:
- Tyranids
- Chaos Space Marines
Termagants
Hordes of Termagants form the bulk of Tyranid assaults. Though a deadly threat to most humans, one-on-one they are inconsequential creatures to a Space Marine – but in large numbers they are deadly. They are equipped with short ranged fleshborer guns, which rapidly fire ravenous beetles.
Tactics: Termagants hang around on the edge of a battle, peppering you with fire and stripping away your armor while you’re engaged in melee. As they’re so fragile, you can easily shoot them to pieces.
Hormagaunts
Swarms of Hormagaunts race at the front of a Tyranid attack. Each one is equipped with four bladed limbs capable of slicing a normal human in two. Hormagaunts can easily bog down a Space Marine with a tide of bodies, sinking their claws into the weakpoints of his armor and butchering him.
Tactics: Hormagaunts engage in large swarms that seek to surround you. Though they have few attacks that do serious damage, their constant attacks will strip your armor away and open you up to more serious foes.
They can be easily staggered by heavy melee attacks, leaving them open to a pistol or melee execution that will restore your shields.
Special attacks: Hormagaunts make a long-ranged leap attack that does serious damage and is telegraphed with a blue aura. If you can parry the attack you’ll grab the leaping beast by its tail and slam it into the ground, or saw it in half, immediately regaining an armor section.
In wave defense sections, swarms of Hormagaunts mass at the bottom of a defensive wall, forming a pile of squirming bodies capable of scaling the wall. Shooting into the piles will shrink them and slow the rate they scale the wall – grenades and explosives are particularly effective.
Tyranid Warriors
Tyranid Warriors are the smallest Tyranid creature capable of relaying the will of the Hive Mind. Often operating in packs of three, this biomorph is larger than a Space Marine, and can be adapted for ranged or melee combat with different bioweapons.
Warriors have a massively armored cranium, which protects the psychic structures that connect them to the hive. While it’s possible to blast their heads off, this involves putting substantial firepower into their skull. Even Space Marine 2 execution shots with your pistol won’t necessarily finish off a warrior.
Tactics: All warriors are substantially more sturdy than Hormagaunts, and their special attacks are particularly damaging. They are a large target, so hitting them at any range is pretty easy, and if you can learn the timings for their melee special attacks, you’ll be able to counter attack and land pistol execution shots on them.
If you do kill a Tyranid warrior, the psychic backlash from their death will destroy the minds of any nearby ‘Gaunts – another reason to shoot the big ones first.
Warrior with twin bone swords
Warriors with twin bone swords are adapted for melee. The swords are psychically conductive, making them stronger and more damaging than the already hardened chitin of other Tyranids.
Tactics: Offensively, this Warrior has attacks you may need to parry or dodge. It can also absord your firepower or melee attacks by crossing its swords and bracing itself, which renders it all but invulnerable to frontal attacks. Heavy melee attacks can break this guard.
Warrior with bone sword and lashwhip
Lashwhips are used to snare prey creatures and drag them off balance.
Tactics: Lashwhip attacks are highlighted with a red aura. This attack cannot be parried, but it can be dodged. If the lashwhip hits you, it will yank you towards the Tyranid and stagger you. But if you successfully dodge the lashwhip attack, the warrior will be vulnerable instead.
Warrior with barbed strangler
Barbed stranglers fire seedpods that burst into a hideous tangle of writhing creepers tipped with venomous thorns.
Tactics: Barbed strangler seeds first land on the ground before exploding into a patch of toxic creepers. As well as dealing damage, remaining in the area of one of these pods will gradually poison you, an effect which makes your vision go blurry and green. A stimpack will immediaetly clear the toxic effect.
The Strangler does not have an effective direct fire mode, so you can run straight at these brutes.
Warrior with devourer
The devourer is a symbiotic ranged weapon that fires a spray of flesh eating maggots that will eat their way through a target’s nervous system towards the brain. It has a considerable rate of fire.
Tactics: Similar to Termagants, this kind of warrior will remain at a distance and constantly bombard you with shots. Killing them requires a concerted effort – ideally, one player draws their fire while another closes into melee, but if you’re playing with bots, pick a mode of violence and commit to it.
Warrior with venom cannon
The venom cannon fires sharp crystals coated in extremely toxic and acidic venom. It’s a lethal weapon, capable of penetrating Space Marine armor and damaging light vehicles.
Tactics: The venom cannon is a sniper rifle that takes a long time to charge, and which has a telegraphed shot – provided you’re paying attention (and not committed to a combo), you can dodge it. In Operations mode, Warriors with venom cannons should be priority targets for your team’s Sniper or Vanguard marines, as they make melee combos much riskier while they’re alive.
Spore Mines
Spore Mines are floating bags of explosive gas, with enough rudimentary intelligence to launch themselves at living creatures before they explode.
Tactics: While they’re at range, any rapid fire weapon will cause mass detonations within the spore mine cloud. If they get close, you’re in trouble, as they deal serious damage when they explode. Their kamikaze attacks are telegraphed with a red aura – make sure you dodge them.
Ripper Swarms
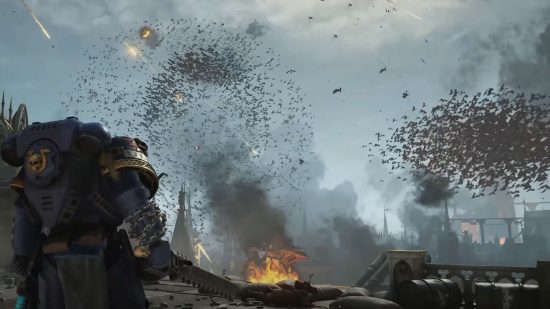
Ripper Swarms are hordes of tiny, voracious, flesh-eating monsters. They’re technically part of the Tyranids’ digestive system, devouring bio-matter on an infested world and returning it to the Hive fleet. Though each Ripper is insignificant, they attack in hordes of thousands.
Tactics: Rippers only show up during specific set pieces in the story campaign. They’re more like a fluid than a horde of individual monsters. While all ranged weapons will damage them, only the short ranged Pyreblaster flamethrower is really effective.
Rippers will generally circle you at a slight distance, occasionally massing into a great swarm which will surge over you like a wave. This is a telegraphed attack that can be dodged – but you can prevent the Rippers from reaching critical mass by dousing them with fire.
The Pyreblaster is ineffective against every other type of Tyranid, making this section difficult if you’re not playing with co-op partners who can protect the flamethrower wielder from other bugs.
Gargoyles
Flocks of winged Gargoyles soar through the skies of any world the Tyranids invade. These are an adaptation of the ‘Gaunt strain, similarly armed with ranged fleshborer guns.
Tactics: Gargoyles aren’t a regular enemy, instead making an appearance in several setpieces where a flock will settle onto a piece of mission-critical equipment and start chewing it to pieces. The most effective weapon for clearing them off is the bolt rifle with underslung grenade launcher: after that, any rapid fire bolt weapon will do the job quickly.
Zoanthrope
The Zoanthrope is a powerful psychic Tyranid monster. It’s a Warhammer 40k psyker, able to channel the energy of the warp to twist reality. Zoanthropes use their psychic powers to float through the air, summon devastating blasts of warp energy, or invigorate other Tyranid creatures.
Tactics: Zoanthropes have multiple abilities that make them very challenging to fight. While they’re in the battle, they will invigorate other Tyranids with their psychic aura, making them more damaging. While it’s tempting to focus all your fire onto the Zoanthropes, ignoring a tide of ‘Gaunts that have been pumped up by the brain bug is a good way to get killed.
Zoanthropes have two ranged attacks, both telegraphed with red auras and which you need to dodge: one is a high damage beam, and the other is a series of three slow moving explosive pulses. If either attack hits you they will disorient you, applying a blur effect to the screen.
Zoanthrope pairs will protect one another with psychic shields – you can break the shields, but you’ll have more effect by shooting the one that isn’t currently shielded. They’re also totally immune to melee attacks, so in PVE operations mode, the Bulwark and Assault Marine are on horde management duty while their buddies with guns deal with the nasty psychic.
Lictor
Lictors are stealth vanguard organisms, often infiltrating planets in advance of the main hive fleet. They use powerful biological camouflage to disguise themselves, allowing them to assassinate enemy leaders. Their feeder tendrils allow them to gather information by devouring the cerebral matter of their prey. The first Lictor you meet in the campaign is a boss, but they appear later and in the PVE operations mode as regular enemies.
Tactics: Lictors begin a fight all but invisible, then enter the fray with a telegraphed, leaping attack – fail to dodge this and you’ll need to do some QTE button presses to escape from their talons.
They’re about as durable as a Tyranid Warrior (notwithstanding the boss fight Lictor), but fight by hitting hard and then retreating. When they turn invisible, they’re still there on the map and can be shot even if you can’t see them – sticking a krak grenade to them is a great way to track their progress and ruin their evening.
Raveners
A variant of the Tyranid warrior species that has a serpentine tail instead of legs, Raveners are capable of rapidly burrowing underground.
Tactics: While they’re on the surface Raveners fight like slightly less sturdy Tyranid warriors, but they don’t remain out in the open for long, preferring to burrow back underground and then strike from ambush.
This tunnelling attack is telegraphed, and can be dodged – they’ll latch onto you and force you into a QTE for survival if you don’t succeed.
Carnifex
The Carnifex is a massive, living wrecking ball, an elite shock organism capable of ripping apart tanks and sundering defensive bastions. Carnifex biomorphs can be spawned with a variety of weapons, but the variants in the game are tailored for melee. They show up at a few different points as campaign bosses.
Tactics: To fight the Carnifex, think like a toreador. The Carnifex will make multiple, sequential telegraphed charge attacks, which will deal massive damage if you don’t dodge them. If it slams into a wall at the end of one of these sequences you’re in luck, and have a bit of time to pummel it.
Being close to the Carnifex is very risky. Though its normal attacks can be blocked, between its four claws and scythed tail there’s no safe angle to make melee attacks. One of its attack sequences ends with all four talons embedded in the ground – it’s not stuck, it’s charging up a short range burst attack as it rips the talons, and a shower of boulders, out of the concrete.
The Carnifex does have a ranged attack, its spine banks, which it can fire from its back. These project a large number of low damage attacks in a column away from the Carnifex – dodge laterally, rather than trying to run further away. While it shoots these it won’t make any melee attacks, so in co-op one player can kite the spine bank shots while the other engages at close range.
Neurothrope
The Neurothrope is a colossal alpha variant of the Zoanthrope, even more monstrously psychically powerful. This is a boss-fight enemy from the campaign.
Tactics: The Neurothrope uses the same powers as the Zoanthrope, albeit bigger and nastier. It also has two extra moves – a psychic storm, where two areas of the battlefield will be highlighted before being engulfed in a high damage psychic blast, and psychic pulses, expanding green spheres centered on the Zoanthrope that you can dodge through.
Unlike the Zoanthrope, the Neurothrope does open itself up to melee attacks at certain points. If you can close the distance with it during the psychic pulse attack you will be able to land some melee hits – though beware, as it has a short range psychic discharge at the end of the pulse waves. Each time it take substantial damage it will also settle to the floor to recover, allowing you to pummel it in melee.
Hive Tyrant
The Hive Tyrant is a walking nexus of the Hive Mind’s will. These towering organisms are apex predators and psychically potent as well as bristling with bioweapons. We need to replay the Hive Tyrant fight a few times before we write this section of the guide!
Why do some enemies have red eyes in Space Marine 2?
Sometimes, you’ll notice enemies with glowing red eyes and a shower of green sparks rising from their backs. These are more aggressive and have more health than normal enemies. While this isn’t remarked on specifically, we’re pretty sure this is the result of the Hive Mind directing more of its attention into these creatures; it might also be the result of adrenal glands, symbiotic organisms that clamp onto other Tyranids and turbo-charge their metabolism and aggression.
Chaos Space Marines in Space Marine 2
The Thousand Sons Chaos Space Marines appear as enemies in Space Marine 2, making their presence known at the end of the campaign’s third Space Marine 2 mission. Worshippers of the blood god Khorne secretly manipulated the events of the original Space Marine, but the Thousand Sons are adherents of the sorcerous Tzeentch.
When the Emperor of Mankind forged the Imperium of Man ten thousand years ago, the Thousand Sons were loyal warriors in the Great Crusade. A mixture of hubris and tragedy saw them fall to the ruinous powers of Chaos during the Horus Heresy civil war.
Cultists
Wretched mortal followers of the Chaos powers, Cultists fight with scavenged weaponry at the behest of their dark masters.
Tactics: Cultists are another fragile ranged troop, similar to Termagants – though being mere humans, they die more easily and run more slowly. As with Termagants, shoot them early in a fight or be prepared for them to strip your armor with nuisance lasgun blasts.
They do have one additional trick – they throw grenades. These are marked with a red icon on your HUD, so make sure you get clear of their blast radius.
Tzaangors
Tzaangors are bestial abhumans, part man, part bird, part goat. They are servants of the Thousand Sons, and fill a similar role to Hormagaunts.
Tactics: Aside from carrying a shield that provides limited protection from your attacks, the Tzaangors fight very similarly to Hormagaunts, including making the same telegraphed leaping attack. Dispatch them accordingly.
Rubric Marines
In the wake of the Horus Heresy civil war, the Thousand Sons legion began to fall foul of uncontrolled mutation. Drastic measures were undertaken to attempt to save them – with dire side effects. The Rubric Marines are what remains of the members of the Legion not gifted with psychic powers, animated suits of Space Marine Armor inhabited by the barest glimmer of sentience, but no less deadly in combat
Tactics: All Rubric Marines are slow, durable, unerring warriors. They move at a trudge, turn to aim slowly, but can relocate a short distance by teleporting. Their armament is very potent, but they can be outmaneuvered at close range.
While Rubrics are ranged troops, they have tricks to punish your for overcommitting in melee. Their telegraphed melee attacks hit like a Land Raider, and their ability to teleport can leave you committed to a heavy attack with no target.
Rubric Marine with warpfire bolter
The Warpfire bolter is a punishing ranged weapon which also has a telegraphed, dodgeable, high power attack.
Rubric Marine with baleflamer
The Baleflamer has a very short range, but it’s utterly lethal. Rolling sideways isn’t much help for dodging this, as the Rubric can just turn to face you, but you can run out of range or past them. They also have a short-ranged, telegraphed fire vortex which will absolutely mess you up if you get caught in it, but the charge up is slow enough that you do have time to escape.
Exalted Sorcerer
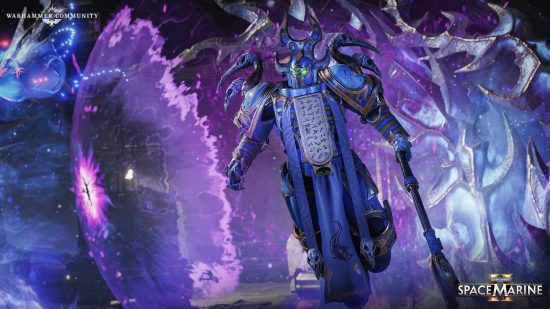
Exalted Sorcerers are potent psykers. As well as the elite gifts of the Space Marines, they are able to draw on the ruinous energies of the Warp and their patron deity Tzeentch to manipulate reality itself. In game they play a similar role to the Zoanthrope, an apex ranged weapon that also acts as a force multiplier to other troops.
Tactics: Similar to the Zoanthrope, Exalted Sorcerers think that walking is beneath them – but they do hover a little closer to the ground, and you can stick a chainsword between their teeth with a little work. Similar to the Zoanthrope they have a potent beam attack, which is telegraphed and can be dodged. It can also be disrupted – the beam first coalesces as an eye-shaped shield, which can be shot out.
Unlike the Zoanthrope, if you get close to them they’ll pull out their staff and try to knock your head off with it. This too is telegraphed and can be parried, but deals serious damage if it connects.
Where the Zoanthrope can buff smaller minions, the Exalted Sorcerer instead resurrects fallen Rubric marines. While the Sorcerer lives, the animated armor just keeps returning.
Scarab Occult Terminators
Scarab Occult Terminators are animated suits of Terminator armor haunted by the faintest ghost of once-living marines. These elite troops are incredibly up-armored and up-gunned.
Ranged terminators
Tactics: Armed with a rapid firing main weapon, either a Soulreaper cannon or Reaper Autocannon, their guns put out a withering hail of fire, while their Havoc missiles launch a salvo of missiles at long range in a telegraphed, dodgeable attack.
This is another foe that’s best approached with jolly cooperation, one player drawing their fire, another closing to melee range and shutting down their massive arsenal with the liberal application of a chainsword.
Melee terminators
Tactics: Unencumbered by bulky missile launchers, these Terminators are terrifyingly fast, striking with their Khopeshes. They attack both with multiple consecutive blows, which can be parried, and with a spinning whirlwind that drives them forward, which must be dodged. Beware – a single parry or dodge doesn’t end this sequence of attacks, so you’re not safe.
Helbrute
Helbrutes are the warp-twisted remains of 40k Dreadnoughts. In loyalist Space Marine Chapters, Dreadnought walkers are piloted by great heroes of the Chapter who have been wounded unto death. The life support technology that keeps loyal heroes alive is twisted by the powers of Chaos into a nightmarish state of undeath, driving those interred within the machine insane.
Helbrutes show up as a bossfight twice in the campaign. All their attacks are very damaging. Their plasma cannon can be dodged – the sequence involves four shots with a gap between each. Their massive thunder hammer is hugely damaging. Sometimes the hammer remains embedded in the earth, causing a large radius around the Helbrute to become electrified – run outside the radius before the energy explodes upwards.
Beware – like other Tzeentchian tricksters, the Helbrute has the ability to teleport. He’ll usually land outside your line of sight, and immediately make a melee attack that needs dodging.
Heldrake
Heldrakes are daemon engines, a Chaos daemon imprisoned in the mechanical shell of a war engine. Heldrakes are predatory and draconic, capable of ripping fighter planes out of the sky, and breathing lethal warpfire onto ground targets. In the campaign, the Heldrake is functionally just an environmental set-piece – it looks incredibly cool.
Exalted Sorcerer on Disc of Tzeentch
You’ll face Imureh twice during the campaign. Exalted Sorcerer Imureh is a multi-stage boss fight. In phase one he zooms around the arena on his disc, immune to melee attacks. He has several attacks:
- A telegraphed, long range beam attack that can be dodged.
- A cloud of magic missiles that disperse and strike all over the arena.
- Opening a portal: while the portal is being opened, you need to hide behind pillars to defend against the attack.
Once the portal is opened, Tzaangors and Rubric Marines with Baleflamers will join the fight. Imureh can resurrect the Rubric Marines just like other Exalted Sorcers.
Once you’ve dealt enough damage, Imureh will lose his disc, drop down to ground level, and start attacking you with his staff. He has a variety of telegraphed melee attacks that must be dodged or parried. He also has a nasty habit of rapidly teleporting, appearing in multiple locations before manifesting behind you to make another attack.
Space Marine 2 is one of the best co-op Warhammer 40k games out there – you can find our full thoughts in our Space Marine 2 review. Our sister site PCGamesN can also tell you Space Marine 2’s length. The heavy bolter isn’t quite as much fun as the one in retro shooter Warhammer 40k: Boltgun, but – as I say in my Boltgun review – that’s so good I want to marry it, so it was always going to struggle.